
Become a student of food…
Today I did a Sam’s run and was thrilled to find that they were carrying a great Kale-Spinach-Swiss Chard-Carrot Medley Salad Mix. It made it a snap to toss this with some of the Pomegranate Chia Seed Dressing I purchased from Sams on my last trip along with some Pine Nuts and Feta cheese.
I also purchased a big ol’ bag of pretty yellow lemons and was itching to use them. So, decided to pair them with some chicken I had taken out earlier in the day to thaw out.
Tip: Fresh lemons are a great staple to have on hand. Not only do they make your copper shine, but squeeze a section of lemon into your ice water and you’ll help your liver flush out toxins and aid your body in digestion (not to mention get some Vitamin C.)

To keep the chicken from sticking to the skillet, I added some bacon grease to the pan as I turned on the heat and before I started to add any seasonings. From there, I added some fresh rosemary from the garden (this smells heavenly I might add y’all), and about 5-6 spoon full of minced garlic, freshly ground Himalayan salt, pepper, and squeezed lemon juice on top and added a slice of lemon to rest on the chicken while it cooked in the skillet under a aluminum foil canopy. I allowed this to cook at medium heat until the chicken breasts reached 165 degrees – 175 degrees internal temp.
A money-saving tip on buying chicken: Check out the freezer section at Sams or Costco and you’ll find it cheaper.

While the chicken was cooking away on the stop top, I added my sliced beets to the oven, lightly drizzled with some canola oil and salted it. I had some rosemary left over from the chicken so threw some on the beets, too. Why not?! 😉 The beets cooked at 350 degrees F. for about the same length of time as the chicken.
Did you know? Buy your beets with their leaves on them. Beet leaves are chock full of nutrients that you can chop up and add to your salad mix. As for the actual beetroot — it has a glycemic load of only 5, which is very low. Studies have shown that beetroots, or beetroot juice, can reduce blood pressure by up to 3-10 mm/Hg over a period of a few hours (21, 23, 24, 25).
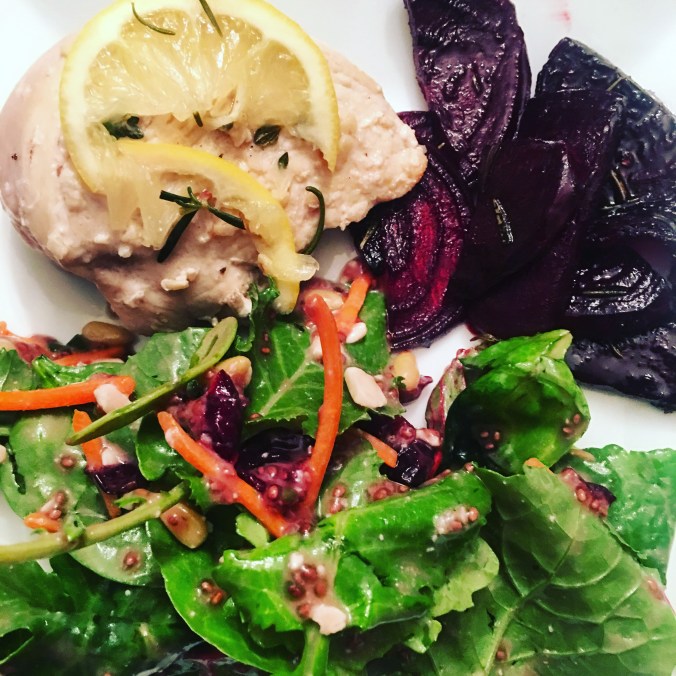
The plating went fast. Just scooped up each chicken breast after checking that all were cooked completely, scooped up some beets, and some salad and — BOOM! Dinner served. My teenage boys ate it all up. They must have been hungry, because they raved at how good it was. My six year old ate everything, too except for the beets. And my three year old daughter only went for the chicken and a little bit of salad. She didn’t want to touch those beets.
Tip: Make extra beets and you can eat your broiled beets the next day on top of your salad. Yum!
Insert recipe here.

INGREDIENTS:
• 5-7 skinless Chicken Breasts
• bacon fat (for skillet)
• 5-7 TBSP Garlic, minced
• 4-5 sprigs of Rosemary Leaves
• freshly ground Pink Himalayan Salt
• freshly ground Pepper
• Lemon Juice (enough to squeeze over each chicken breast)
• sliced Lemons (enough for each chicken breast)
Other things you will need:
• Aluminum Foil
• Large black skillet
• Tongs to remove from skillet
• Heat-resistant spoon to scoop seasonings from pan onto top of chicken as it cooks
• Meat thermometer to test internal temp of chicken for doneness
INSRUCTIONS:
1. Heat your skillet up on medium heat. Add bacon fat to the bottom of the skillet.
2. Add rosemary leaves (fresh), garlic (I use minced garlic from a jar and just store it in the fridge)
3. Add your chicken breasts.
4. Squeeze lemon juice over top of chicken and salt all chicken breasts. Place a lemon slice on top of each chicken breast.
5. Using aluminum foil, create a tent to allow the chicken to cook and to retain moisture in chicken.
6. Every so often, check the chicken for doneness and scoop up some of the seasonings and drizzle on top of each chicken breast. Replace aluminum foil tent until the internal temp reaches 165 -175 degrees.
7. Serve with roasted beets and salad medley or your choice of sides.
This recipe is refined-sugar free, gluten-free, corn-free, and lactose-free.


Check out Dr Berg’s explanation on why those individuals struggling with PCOS benefit from reducing sugar (this would include gluten and any foods that convert as insulin in the body) and how ketosis is essential for burning fat.
Here is part II to watch that expounds on his previous video, building on the knowledge of how to eat to lower your insulin hormone response.
I have personally experienced success using this method of eating. The difficult part the first time you are encountered with this type of information, is the overwhelming feeling of wondering how you’re going to give up not only sugar, but gluten, corn, and white rice that trigger an insulin response.
I remember going in to see my doctor after my fourth son was born and my husband and I had been eating the same foods in the same portion sizes. He had dropped 15 pounds and I had a big goose egg for the third week in a row. I told my doctor how frustrating it felt and he went on to share with me that some people are very sensitive to ANY type of sugar – even artificial sugar. So, I took his word on faith and told him I would give up my artificial sugars for one week to see if it would make a difference. Y’all, when I went in the following week, my jaw dropped as 12 pounds had come off of me. It took four weeks for my body to move in to ketosis. For your body, it might be a shorter timeframe, but for others it might be longer – like he says in the video – even up to six weeks. It all depends on you and the food choices you make.
One thing that I find extremely helpful is logging what goes into my mouth (meals, snacks, and drinks) in an app called Lose It. You can use the basic functions starting out, but now that I’m in the habit of using it, I’ve upgraded to a premium subscription on the app that gives me insights into what foods are meeting my targets and those I should probably avoid in the future. Logging my food brings accountability, makes me more aware of my portion sizes, and also gives me a reference where I can hand the reports my app generates to my naturopathic doctor for her to review and further advise me. The key to logging food is to log your food after every meal. In this app, you can also set up logging reminders – I set my reminders up for times that I usually have finished eating. I also set it a reminder late at night when I tend to get cravings. There have been times where I have gotten it irritated with this reminder, but it has held me accountable which at the end of the day is really what I need.

I had read on many a PCOS group that gluten was not beneficial to those who struggled with PCOS. I would read that and say to myself, “Sure — that might be the case for you, but not me. I’m just fine eating gluten.” Why would I say this knowing that others with the same struggles were nearly screaming the need to get off of gluten?
Y’all, I come from a looooooooong line of wheat farmers. I even own land that produces WHEAT! Every summer, my family would help bring in the wheat harvest. Some of my favorite memories of those hot summers included riding in the dusty cab with my mom in the wheat truck and the times where she would let me crawl into the back of the wheat truck and play in the wheat with my brother while we waited for a wheat combine harvester to be full. (In fact, if you want to learn more about how wheat is harvested, you can check out this video which some might find interesting…) So, you can imagine why I was in denial thinking that even though my PCOS was flaring with cystic breakouts, weight gain, and hair loss, I thought that I only needed to get off of dairy and that would help. Can you say denial? That was me. Fully, 100 percent denial.
I had come to the point where my joints hurt so bad, it was excruciatingly painful to walk the 15 paces from my bed to my bathroom each morning. I would grip the end of my bed frame, using it as a sort of crutch to help stabilize me and aid me in walking four paces as the pain shot up throughout my body. It got so bad, that my feet even began to hurt. I would comment to my husband about the pain and he wondered if I might have broken something in my feet – perhaps fissures. (Looking back, it was a major flare up for gout — I learned of this after reviewing my blood test results.) So, every morning, after I fought thru the initial getting-out-of-bed pain, I would grab some Ibuprofen (thinking this would help my inflammation and reduce the pain). I would pop three of these pain pills in my mouth (not realizing this was hard on my liver and adding harmful metals to my body) along with two allergy pills and all my daily vitamins. Then, I would make my way to my chair where I would sit until the pain subsided as I sipped on tea (I use to sit and sip coffee before I got off caffeine) at least enough for me to get up and do a few things. I would avoid stairs. I would avoid getting up and ask for my kids to run and get me things. This. Was. Not. Living.
I felt horrible. And it just wasn’t a week or so of this, it was month after month. (And I write this not for you to have pity, but simply as a reminder to myself just how far I’ve come.) After fighting off three bad rounds of illness and feeling like I was constantly getting sick from November to February and tired of the pain, my frustration level with my health hit an all time high and I finally made an appointment with a naturopathic doctor my friend and recommended and it took her testing me and me seeing the results for me to come to terms that I was not only lactose intolerant, but intolerant to gluten, corn, and even rice. My doctor put me on the Blood Type Diet and gave me a list of foods that were beneficial and those to avoid based on how the lectins in each food interacted in my body based on blood type. She also adjusted my vitamins and helped me with a plan on when to take these nutrients throughout the day.
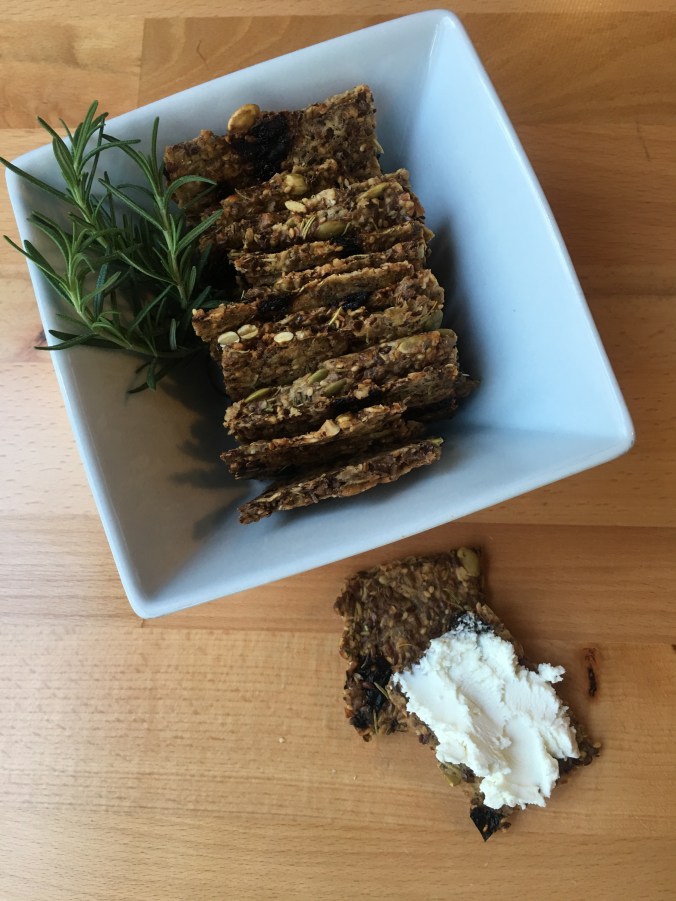
I remember coming home that day and knowing that in order to make this transition and survive, I needed something that would resemble bread to me. I needed something to replace what I was taking away. I knew if I could find at least one thing, I could make it work in the short term. So I hopped onto Pinterest and began to deep dive into research mode, hoping to find something that would work for me. By the grace of God, I came across a post that featured a recipe that intrigued me on mynewroots.org and when I began poking around on her web site and looking at her recipes, my eye was drawn to her “Life Changing Cracker” recipe. My eyes quickly scanned the ingredients. For the most part, I could have everything in it! Eureka! I found my bread replacement! I needed only to swap out the sunflower seeds (I chose to chop up some pecans) and instead of dividing the dough into two different kinds of crackers like she recommends, I added a mix of the two different cracker ingredients and loved the outcome.

My husband, who is diabetic, really likes these Life Changing Crackers as a snack. We take some goat cheese and/or some sun-dried tomato spread and 2-3 crackers would hold us over until meal time and it truly does satisfy. They are tasty with a dried fig on the side, too if we are craving something sweet. What’s more, my kids like them. This is huge! My kids are some of the biggest food critics out there and if they eat it, that says something to y’all! We even like smoothing some almond butter on it if we were missing peanut butter (yes, that was on the avoid list as well.)
I make a batch once a week (sometimes a double-batch because I have a crew of seven to feed). I keep them in a Zip-lock gallon size bag in the fridge and the kids know they can go to this as a snack resource (and that they should only eat a few). These also are a great grab and go item if you know you’ll be out and about running errands. They will be a life-saver if you find your blood sugar levels crashing (you often feel nausea if you’re pre-diabetic or diabetic when this happens.) I sent a bag of these with my hubby when he took the boys out fishing and it (along with a few other healthy snacks) helped him manage his blood sugar levels throughout the day until they had a meal.
Ingredients:
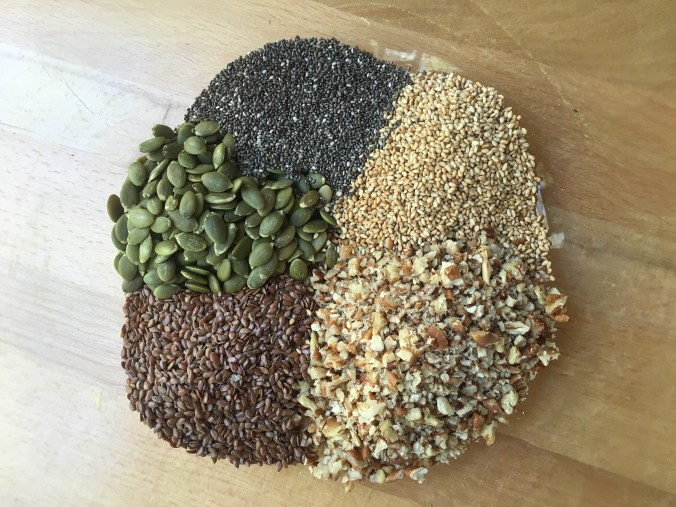
• 1 cup pecans, diced into small bits
• ½ cup flax seeds
• 1/3 cup pumpkin seeds
• ¼ cup sesame seeds
• 1 ½ cups rolled oats
• 2 Tbsp. chia seeds
• 4 Tbsp. psyllium seed husks powder
• 1 ½ tsp. fine grain sea salt
• 1 Tbsp. maple syrup (for sugar-free diets, use a pinch of stevia)
• 3 Tbsp. melted ghee
• 1 ½ cups water
• 2 Tbsp. chopped fresh rosemary
• ¼ tsp. garlic powder (depending on how strong you like it)
• 6 large dried figs (approx. 140g), diced
• 1 tsp. anise seed
• 1 tsp. cracked black pepper
Directions:
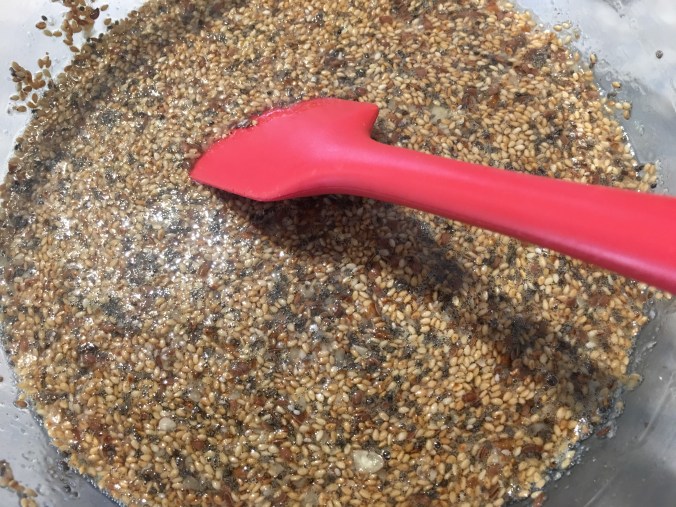
1. In a large bowl combine all dry ingredients, stirring well. Whisk maple syrup, oil and water together in a measuring cup. Add this to the dry ingredients and mix very well until everything is completely soaked and dough becomes very thick (if the dough is too thick to stir, add one or two teaspoons of water until the dough is manageable). Divide the dough roughly in half, and set aside one half.
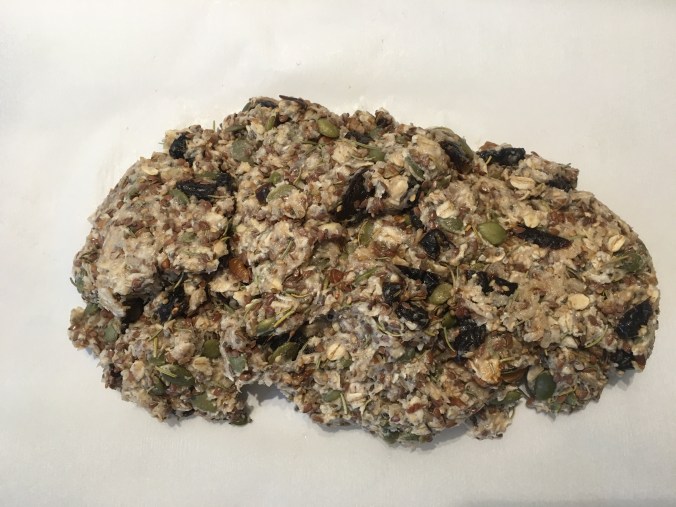
2. Place one half of the dough back into the bowl and add any flavouring you like. Gather into a ball and place it between two sheets of baking paper. Using a rolling pin, firmly roll out into a thin sheet. Remove top layer of baking paper and using the tip of a knife, score the dough into shapes you like (I chose large rectangles but it’s up to you). Repeat with remaining half of dough. Let sit out on the counter for at least 2 hours, or all day or overnight.
3. She recommends setting your oven to 350°F and and baking for 20 minutes and flipping the dough on the cookie sheet (peel the baking paper off of the back and remove before placing back into the oven) and baking for another 10 minutes. Mine always came out a little chewy this way, so I found to make it more crisp (without burning them) if I set my oven to 270°F, and baked for 30 minutes one side, then remove cookie sheet from oven, flip the whole cracker over and return to oven to bake for another 20 minutes, until fully dry, crisp, and golden around the edges.
4. Let cool completely, then break crackers along their scored lines and store in an airtight container for up to 3 weeks.


Coming across this recipe was truly a boost in my faith and gave me the tools I needed to take a monumental step in saying goodbye to gluten as I sought to change my life. She did not stretch the truth when she named these crackers.
— Erin
PS: The wheat farmer’s granddaughter (that would be me) is gluten-free. And as a wheat grower, I may be looking into growing canola instead. Stay tuned on that one. 😉

I’ve seen these “Overnight Oats” recipes all over Pinterest and on many a blog. I would stare at the photo of a jar filled with oats, almond milk, and chia seeds and like Goldilocks and the three bears, I would scratch my head as to why it was so popular to eat a cold porridge.
Maybe it was the repetition of seeing it over and over, maybe I was just wanting to try an easy option to break up my two egg and sausage breakfast pattern, but when I saw Angela Liddon’s (Oh She Glows — ohsheglows.com ) recipe for vegan, gluten-free, no bake/raw, oil-free, refined sugar free, soy free overnight oats, I decided to give it a go.
Here’s what I put in mine:

INGREDIENTS:
• 2 TBSP Chia Seeds
• 1/4 tsp Cinnamon
• 1/2 cup Gluten-Free Rolled Oats
• 3/4 cup Almond Milk
• 1/4 tsp Pure Vanilla Extract
Add the above ingredients to one mason jar the night before you want to eat them. Stir contents and place a lid on top and put in fridge. In the morning, stir and add more almond milk if necessary. If too runny, she recommends adding more chia seeds. I did not do 1 large banana like her recipe calls for, but that is something a type O can eat. My oat’s consistency was perfect in the morning and I added:
• 1/3 cup Blueberries (I like my blueberries frozen)
• 1 TBSP Pure Maple Syrup (optional)

This recipe is refined-sugar free, gluten-free, corn-free, and lactose-free.
The first time I bit into this concoction I had that split second of thinking oats should be hot, but I quickly reminded myself it is suppose to be cold and soon began to settle in and enjoy my easy breakfast. What’s more, I felt great that I got three highly beneficial foods in at the start of the day: cinnamon, blueberries and chia seeds. Here’s a breakdown of why you should be eating this several times a week if you have PCOS:
1 ounce (equals 28 grams or about 2 TBSP) serving of chia seeds contains:
Chia seeds are awesome! The fibers are mostly insoluble (95%). Insoluble fibers have been shown to aid in lowering the risk of diabetes (7, 8, 9, 10). Chia seeds have a high content of heart-healthy omega-3 fatty acids — they are even better than beneficial flaxseeds! Chia seeds also contain high-quality protein with all the essential amino acids, and are an excellent plant-based protein source (29). Chia seeds contain a number of beneficial plant compounds. The main ones are listed below (12, 14, 37).
And as you know with PCOS, gluten is not tolerated well in our body, so here’s the good news — chia seeds are gluten-free!
1 cup serving (148 grams) of blueberries contains:
Blueberries are made up of approximately 85% water — an entire cup contains only 84 calories, with 15 grams of carbohydrates. Blueberries are believed to contain the highest antioxidant capacity of ALL commonly consumed fruits and vegetables. They protect our bodies from damage by free radicals — unstable molecules that can damage cellular structures to our DNA that create aging and contribute to diseases like cancer. What’s more, blueberries can improve cholesterol levels. Did you know that a daily 50 gram serving of blueberries can lower LDL oxidation by 27% in obese individuals, after a period of eight weeks (17)? Another study showed that 75 grams of blueberries with a main meal significantly reduced the oxidation of LDL lipoproteins (18). Blueberries have been found to lower blood pressure. In one study, obese individuals who were high risk for heart disease had a 4-6% reduction in blood pressure, after consuming 50 grams (1.7 ounces) of blueberries per day, for eight weeks (19). Other studies have found similar effects, especially when looking at post-menopausal women (20, 21). Research also suggests that anthocyanins in blueberries can have extremely beneficial effects on insulin sensitivity and glucose metabolism — this is GREAT for individuals struggling with PCOS. Blueberries have also been found to help with unitary tract infections. And finally, blueberries have been found to improve memory, so if you’re experience brain fog, these are your allies in lifting that fog! So, bottom line, eat those yummy blueberries!
Cinnamon is loaded with powerful antioxidants, such as polyphenols (3, 4, 5). In a study that compared the antioxidant activity of 26 spices, cinnamon was the clear winner, even outranking “superfoods” like garlic and oregano (6). Some studies even show that the antioxidants in cinnamon have potent anti-inflammatory effects, which may help lower the risk of disease (3). It reduces levels of total cholesterol, LDL cholesterol and triglycerides, while HDL cholesterol remains stable (8). Cinnamon can also reduce insulin resistance, helping the hormone insulin, to do its job properly (10, 11). First, cinnamon has been shown to decrease the amount of glucose that enters the bloodstream after a meal. It does this by interfering with numerous digestive enzymes, which slows the breakdown of carbohydrates in the digestive tract (12, 13). Second, a compound in cinnamon can act on cells by mimicking insulin (14, 15). This greatly improves glucose uptake by cells, although it acts much slower than insulin itself. Numerous human trials have confirmed the anti-diabetic effects of cinnamon, showing that it can lower fasting blood sugar levels by up to 10-29% (16, 17, 18). Many women with PCOS who are overweight or obese, are pre-diabetic so adding cinnamon to the food you consume each day is important. The effective dose is typically 1-6 grams of cinnamon per day (around 0.5-2 teaspoons). Just make sure you use Ceylon cinnamon whenever possible for greatest benefits.
If you’ve never tried, cold overnight oats, I highly encourage them – especially if you have a tendency to need to dash off to work. But per my doctor, make sure this is only eaten 1x-2x a week at the most as rolled oats can act like gluten in the body.
They can also make an easy lunch option to pack if you have a fridge you can access to work. Drop it off when you get to work and they’ll be chilled by lunch. Let me know what you think if you try these. Or if you have some mix-ins you like, feel free to share!
— Erin
In one hour, my husband and I knocked out three food preps: mangos on the dehydrator, making some almond milk, and prepping the sweet potato fries. Easy peasy breasy!


